My shower has leaked for months. I stopped it by turning the tap tighter and tighter. Over-tightening the taps in this way can make the washers progressively weaker. The dripping has become less of lo-fi beats to chill to, and more brutal rhythm of drum & bass.
To continue in this way would mean that I'm the only person in the family able to turn on the tap, or fully turn it off. I've never done any plumbing before, and so today I'll be tackling replacing a washer in my shower tap. The water that drips is usually cold, so that gave me a place to start.
Tools:
- Adjustable wrench
- Needle-nose pliers
- Rubber washers (1/2 inch)
Finding the water mains
I ventured out to the front yard looking for an isolation valve. I expected it to be underground. Instead, I found this little T-shaped tap inconspicuously sticking out of the ground.
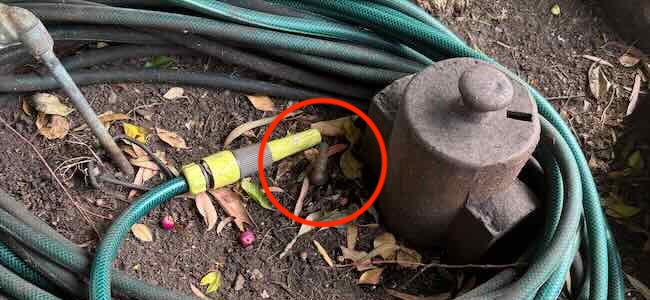
I turn it off and, sure enough, the house was without water. It was a relief that I wouldn't have to put on some gloves and start digging up the yard.
Disassembling the tap
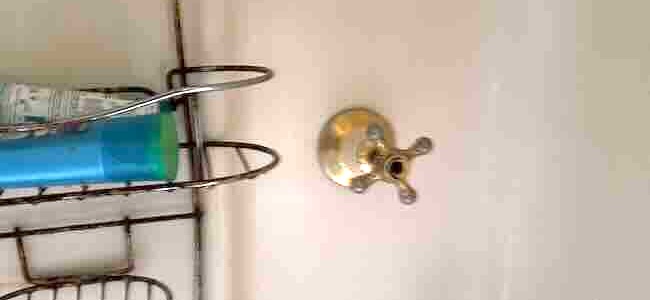
Here is the cold-water tap. I open up both taps all the way, in case I need to replace the other washer, too. I unscrewed the cap and wiggled off the handle. Next I unscrewed the outer cover which was made up of four pieces.
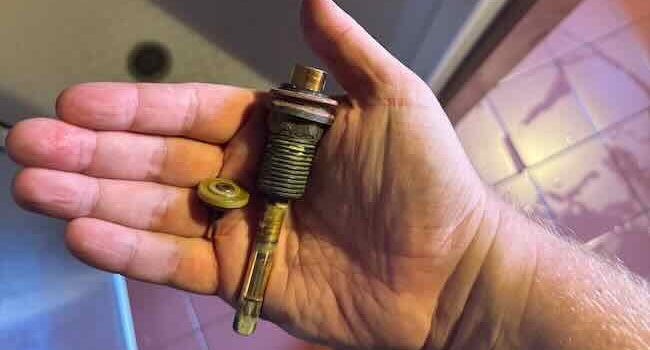
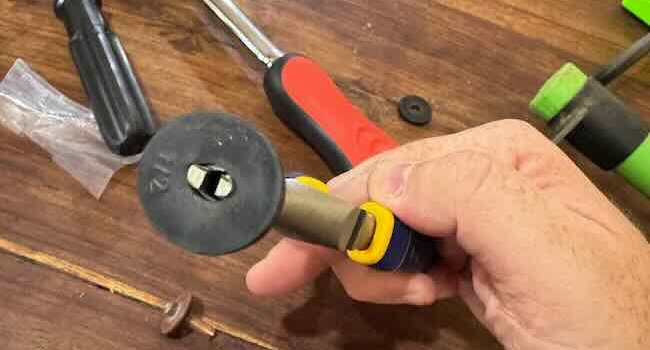
Now the spindle is exposed. I have an adjustable wrench and a tap spanner, which I hope is long enough to slip over the top. The spindle measured 22mm. It was a pleasant and helpful surprise that the wrench had a ruler.
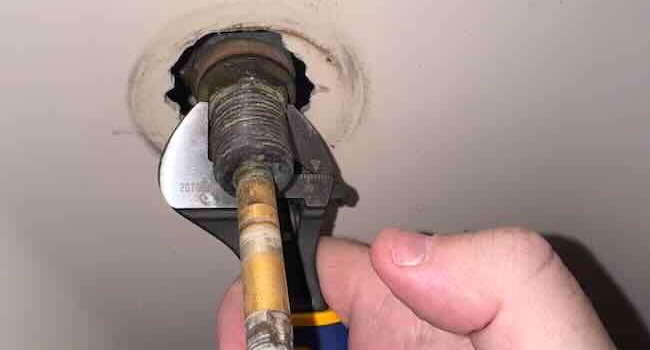
I wasn't able to loosen the spindle at first. I was worried about breaking the part, or possibly damaging the fibreglass. My largest tap spanner socket was only 13mm. I suppose it's for bathroom taps rather than showers, or something. Anyway, I had a problem. I needed a 22mm socket.
There is an auto repair shop down the road. I decide to go for a walk and enjoy the beautiful 23°C Autumn day. First I go to get a glass of water from the kitchen tap. Of course, the water is shut off. I have a good laugh at my own expense, that must happen all the time.
In the store I find a couple of socket sets with a 22mm socket. I buy a drive socket set and return home.
Of course, I quickly find, a drive socket won't work. The spindle has a long piece of metal in the way! I channel that indignation back into the adjustable wrench. The spindle takes pity, loosens, and twists off, defeated.
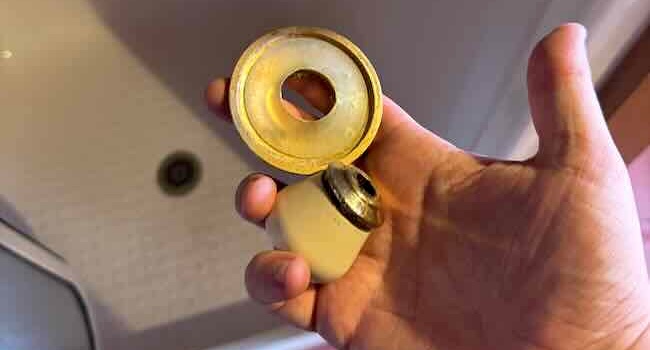
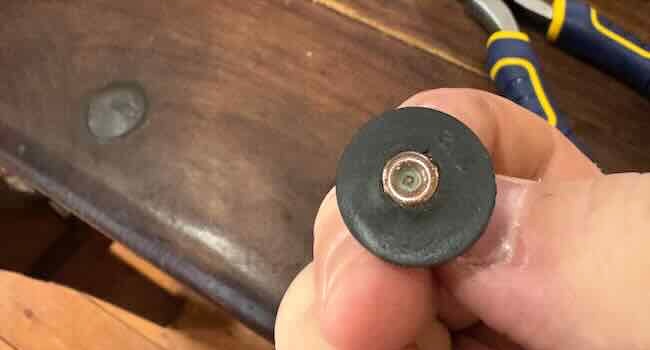
I pull out the slippery washer. But not before almost dropping it into the gap between the fibreglass and the pipe.
Replacing the washer
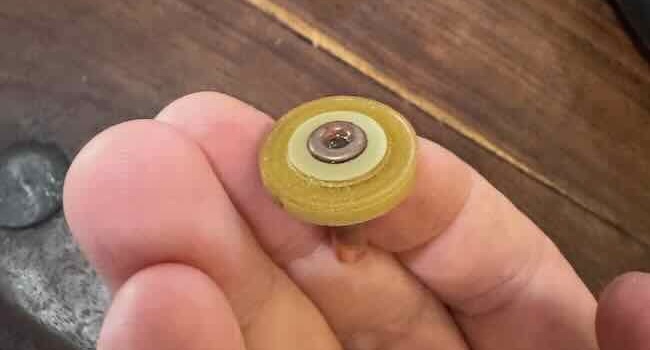
I am more confident that the washer is the issue. You can make out the deep circular groove that had formed. This deepening groove is why you need to turn the tap tighter and tighter over time, to try and maintain a seal. Watch out for the loose seal!

It was actually quite hard to remove the washer. The metal piece had this sort of expanded groove/ridge to keep the seal in place, and it worked too well. I use some needle-nosed pliers to pull the washer off. Then I face a new challenge: how to get the new washer back over this groove.
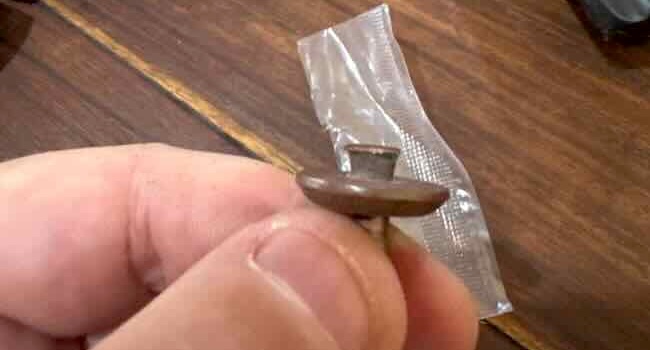
The washers had a little give. I tried to pull the washer over with my fingers but it was too finnicky. I try to remove that ridged piece (hoping it was screwed in) but it didn't seem to be the case, or at least, I was unable to find the way it was fastened. I think about suspending the washer in some hot water to loosen it. Then I have an idea to stretch the hole a little with some pliers.
My first attempt split a washer in half. My second attempt loosens the washer, and I am able to attach it, albeit with a tiny crack in the centre. I decide to test it out: I could replace the washer again if necessary, but now is a good time to know if the washer was at fault for my leaking tap.
I reassemble the cold water tap. I close the cold water tap. I turn on the water mains and go back inside. Of course, I forgot to turn off the hot water tap. There is a lot of water across my bathroom floor. I turn off the hot water tap, and there is no dripping. I turn the cold water tap on and off, and the dripping has still stopped. It is done. The leak is fixed!
Lessons for next time
There were a few things I would do differently the next time I need to change a washer.
The first is to get some steel wool (or similar) to make it easier to clean gunk from the metal parts.
The second is to pay more attention to what specific tools I might need. Perhaps to imagine myself using the tool on the spindle, which would have quickly highlighted the issue, and heled me avoid wasting time and money. I can return the set, but nevertheless, a lesson learned with hardware.
Reflections
In all, this project took a couple of hours, including watching some instructional YouTube videos and the unnecessary trip to the auto store. With what I know now, I think it'd take 10-15 minutes in future.
Why write about this project?
In my 38 years, I haven't done any plumbing before that involved turning off the water mains.
I'm not claiming it is hard. You can certainly think I'm sheltered. I agree. And that was a factor in deciding to document my projects and first experiences on this site; to try new things, and get back to some old-school web content.
This project means I would avoid the trap of overthinking about some massive project and then never doing it (or writing about it). I did something which was a small stretch for me. I've struck first blood, or at least, water. I have some momentum! And, I get this article. A little memento of what I did around midday on Saturday 22 March, 2025. I'll never get this day again. But I'll be able to visit it again if I ever wish to. Thanks for reading.